

How many times have you heard that making your own bread is better than anything you can buy at the supermarket? Well, it’s said so often because it’s true but I think it is especially true in the case of Pitta Bread.
The ones you buy at the supermarket stuffed into a factory sealed plastic bag are less than inspiring to eat. They lack flavour and are just a bit cardboard-like in texture. The good news is pitta are incredibly simple to make as they only require one single prove.

From the point of view of flavour, a slow prove is always best and you could make the dough before bed and pop it in the fridge for an overnight slow prove if you like, bringing back to room temperature before using.
But a little oil and a seasoning of salt do wonders for both the flavour and the texture of the bread when made speedily in under an hour and a half. Using some wholemeal flour also gives them a fabulously authentic taste.
Plus look at that puff! When has your sad little bag of pittas from the local shop ever been bulging with a chubby beauty like this one?!

The trick is simple. You want to get your oven very hot and if you have one, a welsh bakestone is indispensable for home breadmaking.

Putting it in the oven to preheat with the oven means your bread starts to “spring” as soon as the baking tray hits the hot piece of steel and you get a beautiful rise. If you don’t have one, a heavy duty baking tray is the best substitute as it will resist warping in the high heat.
I’ve been using these baking trays for a couple of years now and I love them. They will twist a little if you put your oven on maximum but not very much and they always return to being perfectly flat when they’re cool:
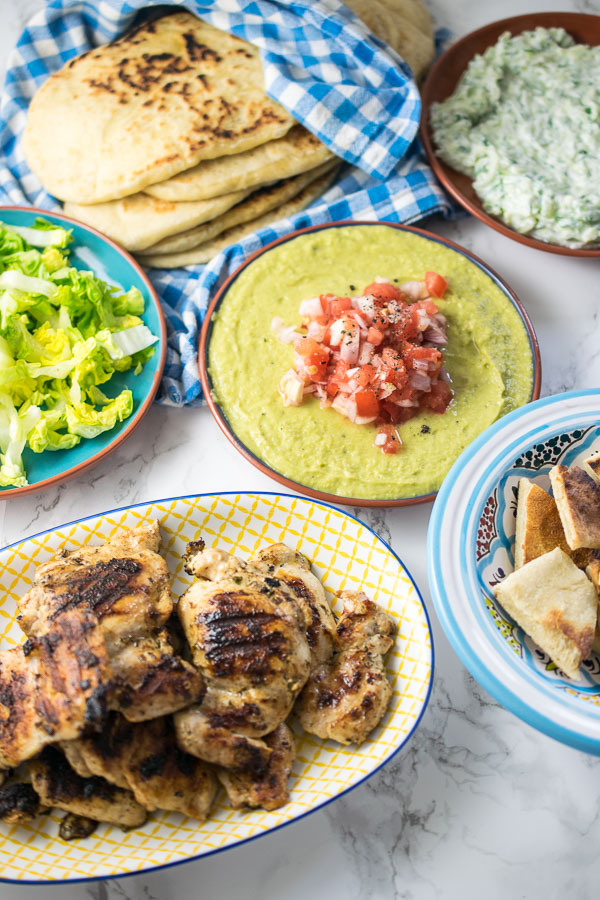
Once you have your toasty warm, puffy pittas we need something to eat them with. How about this feast? It’s my Greek Chicken Dinner:

And hummus would not be quite the joy it is without shards of day-old pitta, reheated and crispened up a little in the toaster to dunk into it. I make mine in the Instant Pot:

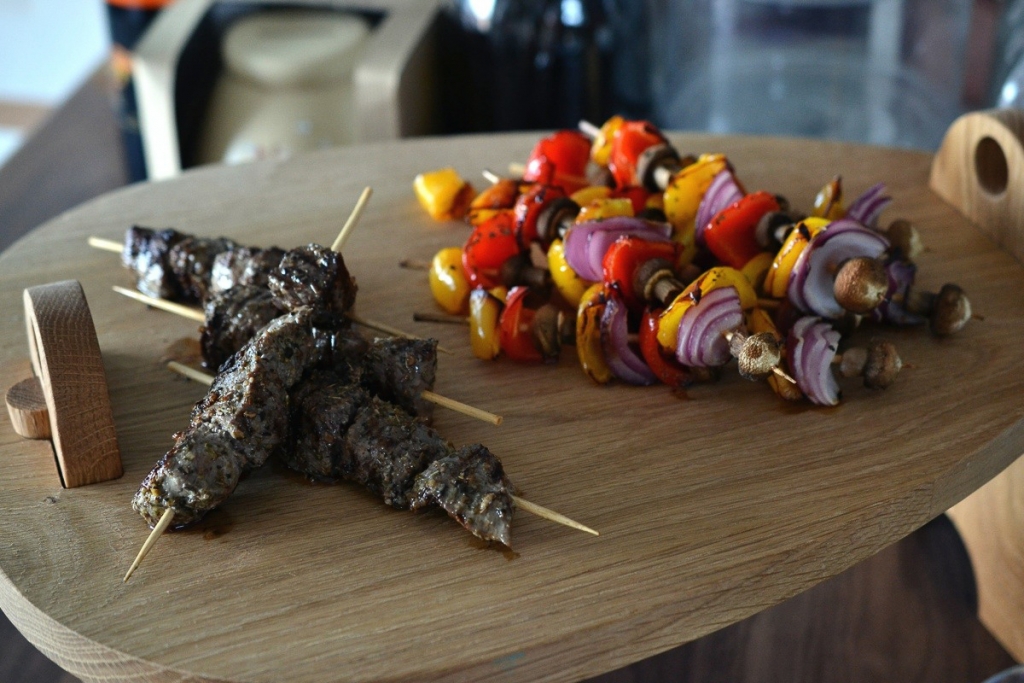
Beef souvlaki – cubes of marinaded and charred steak – plus chargrilled veg and a healthy amount of fresh salad are also wonderful wodged into a pitta pocket. Don’t forget plenty of tzatziki:
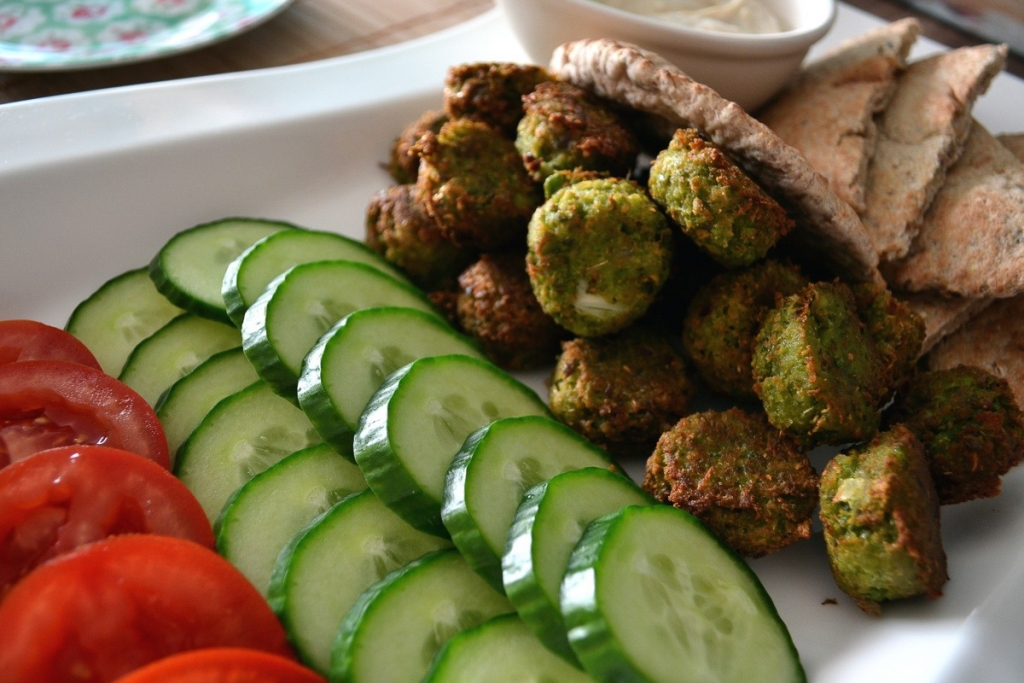
If you are feeling in the need for extra veg in your life, you can’t go far wrong with my Pealafels. Think falafel made with peas and edamame, and a little mint. They are divine little nuggets of loveliness!:
How do you like to have your pittas? I’d love you to let me know in the comments below the recipe!

Wholemeal Pitta Breads

How to make perfect pitta which puff up every time! Don't forget to check out the video for help with shaping.
Ingredients
- 100g wholemeal flour (3/4 cup)
- 150g white bread flour (1 cup and 2 tbsp)
- 1.5 tsp olive oil
- 1 tsp dried active yeast
- 1/2 tsp salt
- 150g water (1/2 cup plus 1 tbsp)
Instructions
- Mix all but the water together well then dribble in the water until you have a soft and slightly sticky dough. Knead in a stand mixer for 5-10 minutes or slightly longer by hand.
- Pop in a lightly greased bowl and cover until proved to double the size. About an hour in a warm room.
- Preheat the oven to 220˚C and if you have one, a welsh bakestone to get hot. If not, a spare baking sheet is a good alternative.
- Divide the dough into 4 equal pieces and roll into a tight ball, using your cupped hand. I find lightly greasing my hands first is helpful.
- Roll each ball out to a large oval shape (don't worry if it's a bit irregular) about 1/4 inch or 5 mm thick. Place them on baking sheets, I find I need two so not to have them touch whilst baking.
- Bake the first two breads for 8 minutes until very well risen and puffed up, but only lightly browned. Pop the second tray in and repeat.
- As soon as the breads are out of the oven, wrap in a clean tea towel to keep then steam in to prevent them from crisping up. Allow to cool before slicing, filling and eating.
Notes
- Will keep in a paper bag for a couple of days.
- You're best popping them in the toaster if eating on the second or third day of making.
- These pittas freeze very well, just allow to go completely cold and then I like to place in a large freezer bag with greaseproof between the pittas to make it easy to take one out at a time.
This post contains affiliate links, meaning I will earn a little commission if you chose to buy items I’ve advertised, helping me to bring you all these recipes for free!
Like this post? Then why not try these related recipes:
-

- Homemade Bagels
-

- Homemade Roti
-

- Chilli Cheese Garlic Dough Balls
Yum!! This sounds doable. Thanks for sharing,
You’re very welcome 🙂