

Jam making. Ah, it can be a contrary business. As you can buy almost any type of jam you like from small supermarkets or even corner shops, it can seem a bit bonkers to get all worked up trying to anticipate whether the setting point has been achieved and dealing with gigantic vats of boiling fruit and sugar.
But there is something so old English, so country housewife, so simple-life about the idea of making my own, that draws me in every summer. There is a ton of information out there on how to do it at home both online and in good old fashioned cookery books, and I do recommend reading up on it so you are appraised of the literature and can react to your instincts as you make your own as I find following methods slavishly has seen me turn out too many jars of road tar rather than beautifully softly set glistening jars of jam. M
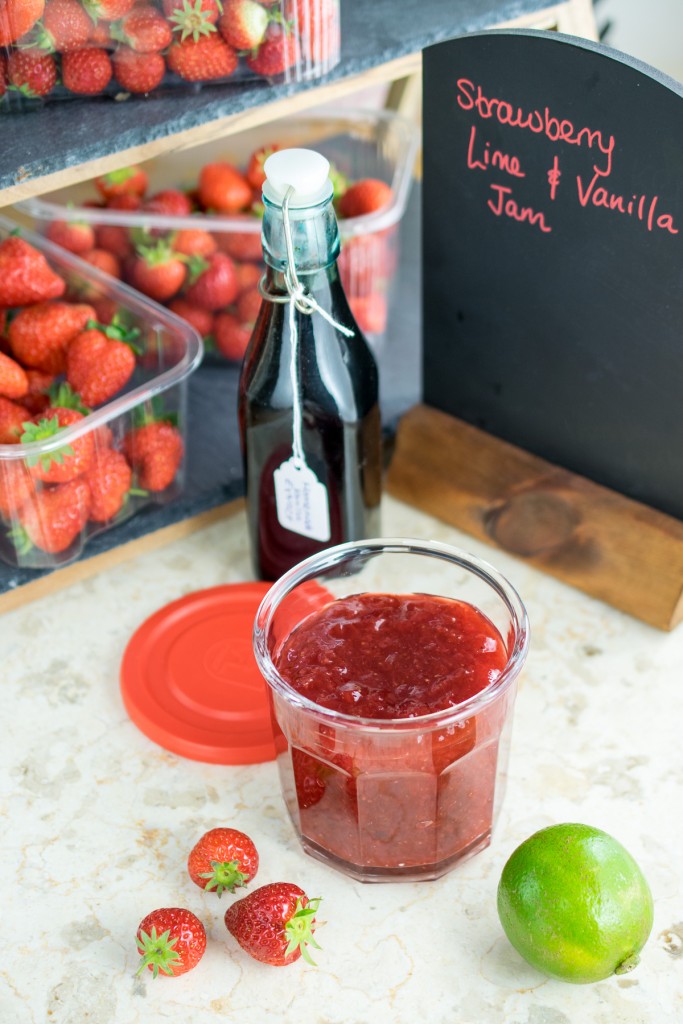
y Strawberry, Lime & Vanilla Jam uses half the sugar that trad recipes do so all the flavours shine brightly through the sweetness and if you have only ever tasted commercially produced jams before, you’ll be blown away about how the fruitiness is front and centre with the sugar very much in the background.
A bit of a breakthrough came when I was reading the very old The Women’s Institute Book Of Preserves & Pickles which talked about how you need the fruit to evaporate off much of their liquid content before the setting point is achieved. Interesting. It would seem evaporating the water to leave the fruit pulp and sugar brings about a set, not achieving the elusive 104-105˚C on a sugar thermometer that I have struggled to reach.
Tell me I’m not the only one! The one time I did get it to temp, it took so long that I should have known the chewy, thick, road tar in the pan before me was not going to magically cool to a luxurious soft set. And that was with my top quality Thermapen thermometer.
When you stand by the pot, stir frequently and watch the pan of bubbling fruit before you, you can almost see when the set point has been reached. It will reduce in volume quite a bit and the best marker for me is the “flake” test – stir the jam with your spoon or spatula and let it run off into the pan. It is ready when it falls off in “flakes” – kind of like porridge oats.
When you’ve seen it once, you’ll know exactly what I mean. And it is always best to underdo a jam, allow it to cool in the prepared jars, then give them a jiggle and see if the set is what you want it to be. If it is too runny, scoop them all back into the pan and try again following the same advice and guidelines. It may take a few batches to make (so don’t choose a recipe with 5lbs of fruit in for your first go!) but once you’ve got the knack, there will be no end to your passion for preserving 😀
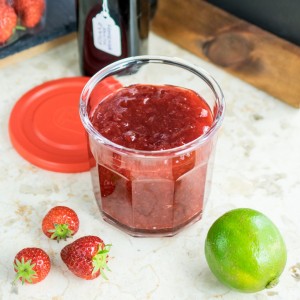
- 750 g strawberries rinsed and hulled
- 375 g caster sugar
- One vanilla bean
- Zest and juice of two limes
-
Put a couple of side plates in the fridge to chill as you prep the jam.
-
Finely chop your strawberries with a knife or pulse in a food processor until you have a mulch of fruit before you. Scrape into a preserving pan or the largest saucepan or casserole you have and stir in the sugar.
-
Scrape the seeds out of the vanilla bean and add them plus the whole pod to the pan along with the zest and juice of the limes.
-
Once the sugar has dissolved (give it a good stir to help it all amalgamate) turn the heat up to high and bring the pan of fruit to a rolling boil. Do not leave it's side. Stir frequently to ensure none sticks and burns on the bottom of the pan.
-
Keep at the rolling boil stage, adjusting the temperature of your hob as needed. Keep on stirring and what you are looking for is the fruit to evaporate off enough liquid that the mixture becomes heavy on your spoon - usually about 10 minutes in. Look for "flakes" forming i.e. when you lift your spatula out, the jam will fall off in flakes back into the pan, rather than a steady liquid stream. Another good test is to take the jam off the heat, place a teaspoonful onto a cold plate and leave for a few minutes then push your finger through it - if it ripples and wrinkles, mostly holding this shape, then it is ready. A final test is to take the temperature of the jam and if it reaches 105°C it is ready. I find this the least reliable method and do not use it any more but it is in all the jam making books I've read!
-
Once the setting point has been achieved, retrieve and discard the vanilla bean then ladle your jam into sterilised* jars and seal immediately. Leave to cool completely before using.
-
Note - if the jam is runnier than you would like once completely cold, simply return it all to the washed out pan and boil again and you should be just fine.
*= I sterilise my jars by putting them through the dishwasher on the hot cycle and using whilst still warm.
This post contains affiliate links, meaning I will earn a little commission if you chose to buy items I’ve advertised, helping me to bring you all these recipes for free!
Like this post? Then why not try these related recipes:
-

- Vanilla Swirl Cake For One
-

- Ambrosia Jam
-

- Bing Cherry Jam
I love this! Great way to use up some of those incredible sweet strawberries. Vanilla and lime sounds like the perfect combination with strawberries. I can’t wait to spread some of this jam on toast. 🙂
Thanks! These little baby strawberries were certainly very sweet and flavourful. I’m hopeful we are going to have a good British strawb season this year, it can be very hit and miss but bad weather earlier in the year normally makes for a good summer of strawbs 😀
this jam looks amazing! i love that you added lime too. definitely need to add it into my jams next time.
Wow this sounds incredible!! I love jam in general, but I’ve never come across this combo.
I do a strawberry coulis with Chambord and lime – it’s on the blog (I serve it with my pannacotta). You have to try it – it’s a taste sensation!
This sounds delicious! I love the addition of lime to the strawberry.
Thanks Elizabeth!
I usually put lemon juice in my strawberry jam. I’ll definitely have to try lime next time!
It’s grand to ring the changes!
What a refreshing combination! And I love non-pectin recipes, everything is so easy 🙂
I’ve never added it to jam but I have made fruit pastilles with it once, so much less faff not to have a bottle of the stuff to use up!
I love making jam, but I totally agree that getting the soft set just right without pectin is tricky. Interesting to know evaporation may be more important than temperature (I usually put a plate in the freezer and drizzle some jam on it when I think it’s getting close to test the set, but I admit I don’t always get it right). This flavor combination sound lovely!
Well, it’s one of my theories Mary, and it seems to make sense. I do the plate thing too but it is hit and miss, as you say. Having new info and techniques helps make it easier to judge when the jam is ready as there ain’t no rescuing it once it’s gone too far!
Oooh great tips! And lime and vanilla in a strawberry jam? LOVE the addition of those flavors to your normal strawberry jam!
I LOVE this flavor combo! You make the process sound totally doable. It makes me want to try my hand at jam making. And major bonus that this recipe contains less sugar than usual!
Lower sugar jams don’t keep as long but my friend who sells her own homemade jams says you still get a year out of them if stored correctly 🙂
Hi! Once the jam is in the sterilized jars you forego the water bath processing step to can them correct? Do you then store in room temp or in the refrigerator? Thanks for the great recipe.
Hi Jennifer, thanks for your great question. I’m an English blogger and we don’t use water baths or canning methods for our preserves, but I know this is commonly done in the US. I must try it myself so I can advise readers more thoroughly! But over this side of the pond, once a jar of jam is filled and sealed, you can store it in a cool dark place, unopened almost indefinitely (in theory) but the reality is that the seal we get at home isn’t likely to be hermetic (perfect) so the shelf-life is 6-12 months before opening. You only need to keep it in the fridge after it is opened x