

Back when I was in dental school, we were mainly based at Guy’s Campus (essentially next door to Borough Market!) but a few sessions were scheduled at the King’s College campus in Denmark Hill. This afforded me and my firm the excuse to use our student discount to go to Nandos for lunch, as it was so close to the hospital.
We did that almost every time we went to Denmark Hill and now that I think back over it, I am reminded of how wonderful it was to have such good friends that even though we spent all week together at university, we still wanted to have lunch together as a group as well as spending a lot of our evenings and weekends together too.
I miss those guys and those happy days. But luckily, now I’ve worked out how to make Peri-Peri Sauce myself, I can have Homemade Nandos whenever I like and recall those uni days through my favourite medium – food.
[clickToTweet tweet=”How to make your own Homemade Nandos with this Peri-Peri Sauce!” quote=”How to make your own Homemade Nandos with this Peri-Peri Sauce!”]
If you don’t eat at Nandos, then you need to know this is a grilled chicken restaurant originating in Johannesburg, South Africa although it has heavy Portuguese influences. It’s incredibly tasty stuff – you can order pieces of or whole chickens cooked over charcoal grills, basted with their addictive Peri-Peri sauce which you can order as hot as you like.
You know I’m practically immune to chilli so I default to Hungry Hubby (also a big Nandos fan) to tell you that my recipe for Peri-Peri Sauce would be rated as their “Hot”. If you like a mere tickle of the hot stuff, then use only 10 chillies and you’ll be grand. I love the heat so use 20 and just keep a stack of napkins for The Hungry One to mop his brow with as I don’t even break a sweat 😉
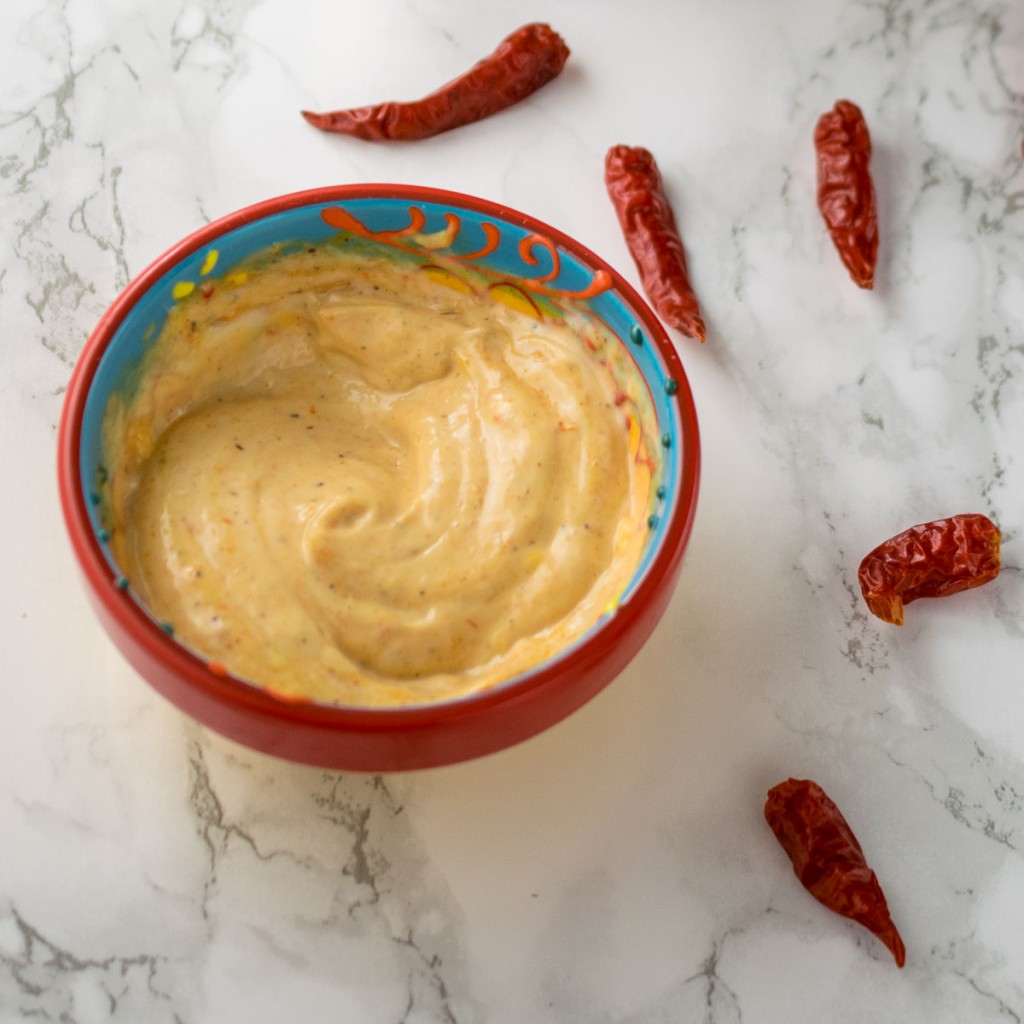
Peri-Peri (also called piri-piri) chillies are tiny little bright red chillies which you can find more readily available dried here in the UK than fresh. They are very hot and spicy and form the essence of this sauce.
You do need to soak them in boiling water overnight to rehydrate them before using but the resulting sauce is worth the wait. I found mine at Spice Mountain on my last trip to London’s Borough Market but you can order from them online and they ship worldwide. This isn’t a sponsored post, I just love them!

The chicken is certainly the star of the show at Nandos but me and Hungry Hubby love a good condiment to dip into and Perinaise is something you must try when you make a batch of my Peri-Peri sauce. Simply stir 1 tbsp of the sauce into about 4 tbsp of mayonnaise and you are in for such a treat!
As it makes quite a lot of sauce, I tend to use some to baste a whole spatchcocked chicken or some drumsticks with then I bag up the rest and freeze it. What I do is put 4-6 tbsp worth into freezer bags for future whole chickens or I coat some chicken thighs or even salmon fillets in it before freezing them raw.
They will emerge fully tenderised and oh so flavourful when thawed and will make a super fast and delicious midweek meal for you. I grill or roast meat coated in my Peri-Peri Sauce in the colder months but I can’t wait for the summer to get that charcoal smokiness into the mix on the BBQ.
Peri-Peri Sauce aka Homemade Nandos!

A hot and spicy sauce to be used as a marinade for meat or fish, or even stirred into mayonnaise to make your own Perinaise! As close as you can get to Nandos without knowing their actual secret recipe!
Ingredients
- 20 dried peri-peri chillies reduce to 10 for a mild sauce
- 2 roasted red peppers from a jar in vinegar or oil
- 2 red onions peeled and thickly sliced
- 4 cloves of garlic peeled
- 2 large lemons zest and juice of both
- 120 ml cider vinegar
- 2 tsp smoked paprika
- 1 tbsp dried oregano
- 2 tsp sea salt
- 1 tbsp soft brown sugar
- 1 tsp cracked black pepper
- 2 dried bay leaves
- 1/2 tsp ground allspice
- 120 ml olive oil
Instructions
- The day before you want to start, wash the dried red chillies then place in a medium bowl. Cover with just boiled water then cover with clingfilm. Allow to sit for 12-24 hours to rehydrate and soften.
- Start by charring the onion slices and garlic cloves in a grill pan on high heat. Turn them regularly until the onion has softened and has some good char marks on it - the garlic will take less time. Place in a food process with the blades on or in a blender jug.
- Drain the chillies and red peppers then add to the food processor/blender followed by all the remaining ingredients apart from the oil. Blitz to mix until you have a smooth paste, which may take a couple of minutes and some scraping down.
- Add the contents of the food processor/blender into a medium saucepan and over medium heat, reduce the sauce by a third. Stir frequently to prevent catching and stand back so you don't inhale the vinegary chilli fumes!
- Allow the thickened sauce to cool down whilst you clean out the food processor/blender and scrape it back in. With the motor running, trickle the oil in in a thin and steady stream (like when making pesto or mayo). Once emulsified (thick and glossy with no separated oil) and fully cooled, you can use the sauce straight away.
- It will keep for 48 hours in the fridge or you can freeze it in portions. I like to coat some meat or fish with it before freezing so I have a fast to make dinner stored away for another day!
Notes
With 20 chillies, you have what would be the "Hot" version of the sauce from Nandos. If you want a mild but full flavoured and warming version, reduce to 10 instead.
This post contains affiliate links, meaning I will earn a little commission if you chose to buy items I’ve advertised, helping me to bring you all these recipes for free
Like this post? Then why not try these related recipes:
-

- All Purpose Curry Paste
-

- Homemade KFC Zinger Burger
-

- Homemade KFC Bargain Bucket
I’ve never heard of peri peri sauce before. My oldest loves thins with heat so it’s probably right up his alley.
Chilli fans will love this for sure Val – it’s quite fiery and very versatile 😀
I have never experienced peri peri sauce!! This looks so full of flavor and has a wonderful color!!
Oh then you must experience this sauce then Dene! And thank you 😀
I’ve never tried these chilies before. Looks like a sauce that would be delicious on practically anything!
Yep, it’s addictive stuff! I am sure you could use it in a great man more dishes 😀
Oh I could use that sauce on a slice of bread. I love peri peri sauce but I usually just buy it off the shelf. I must try to make it home. Love the color of those chillies
Ooo, now I am imagining making garlic bread and spreading this on it ooo!
Wow look at that color, homemade is always best, would love to try this sometime soon!!
Isn’t it just Priya? You can’t beat a homespun version of anything edible 😀
I’ve never heard of peri peri chilies before but this recipe sounds delicious! I’ll have to look to see where I can find some locally to try this. I LOVE spicy!
Bird’s eye chillies would be a close alternative if you can find those – basically you want a hot, fiery red chilli. Peri peri ones are traditional but you can certainly use others. Just be careful about how hot the ones you find are and adapt the recipe accordingly!
We have Nandos as well, here in Australia, so I am very familiar with their Peri Peri sauce. It’s a great sauce, and now I have a recipe on hand to make it. Thanks, great job.
You’re welcome Mark – I think you’ll find it really close to the original recipe 😀
I’m not much of a spice lover, but my coworker is Portuguese and swears by Piri Piri sauce. Maybe I’ll be extra nice and make some of this for her as a gift. Looks beautiful!
Thank you Byron. What a kind coworker you are, thinking of making this for your colleague, esepcially if you don’t like hot stuff!
We don’t have Nando’s here, but I have heard a lot about them. I need to make this Peri Peri sauce and try it for myself.
This sauce will make you think you’re in Nandos Pam lol! It’s really close to the restaurant version 😀
Hubby loves this sauce. Never tried to make it at home before, but would love to try it. Seems pretty simple.
Oh go on, treat your hubs to a homemade version then Anvita – so worth sourcing the chillies for!
I’ve never heard of Nando’s but this sauce looks amazing! I’m going to try it on some chicken.
I hope you like it Tanya! I’m surprised that Nandos isn’t more popular in the States – it’s so dang tasty!
I love spicy foods so this sauce sounds great! I’ve never heard of Nandos but I think this sauce could be used on lots of dishes!
Yep, you got it Stephanie – you can use it in so many things! A very versatile sauce 😀
Yum!! I think I definitely need to try this sauce. I’ve never had Peri-Peri Sauce before!
Oh then you must Christine! It’s superb, whether or not you have been to Nandos 😀
That sounds like a great marinade/spice/sauce to have on hand. Somewhere in our cupboard, we have some peri peri packets. I’m going to have to search and see. We eat chicken about as often as we eat fish — this sauce would be a great way to season it.
I’d be interested to see what was in those packets Marisa – I bet it would be easy to whip up your own spice blend. This sauce works equally well on fish or chicken so it’s a great marinade to have stashed in the freezer 😀
I haven’t been to a Nandos in at least 5 years! I love the idea of using the peri-peri sauce on salmon, such a great flavor for fish!
Me and Hungry Hubby don’t go to Nandos anymore either – no need now I’ve figured out the secret sauce 😉 It’s fabulous with salmon. The oiliness of the fish cuts the spice nicely 😀
Nando’s was my favorite restaurant in London. We love the peri peri sauce and miss it all the time! Can’t wait to make this- just need to get a hold of the chilies
You can order from Spice Mountain worldwide so you won’t be too far away from a taste of Nandos Hanady!
My friend grows tiny red peppers for hot sauce and I have had the chance to try theirs. I really want to grab some of these peppers and make this sauce. The yellow color looks amazing!
Oh that would be so cool! It would be a 100% homemade then – I hope your friend shares some chillies with you 😀
We eat a lot of spice and that sauce would be so famous in my house. I must definitely give this a try. Love the bright color of the sauce.
We are ex Zimbabwean’s and Piri Piri chicken certainly is a favorite, I believe it originated in the Portuguese communities in Mozambique. The chillies they use are called birds eye (dried are best) which are crushed and put in a bottle with olive oil for use as and when. A dear old Portugese lady showed us how to make Piri Piri chicken it really is great and will give Nando’s a go, yours is quite different and we certainly will be trying it and will let you know.
Hi Ron – thanks so much for your detailed comment. How wonderful to learn from an expert Portuguese lady! I’ve not been so lucky so you may not find my recipe “authentic” but hopefully the lack of authenticity on this occasion is offset by a delicious marinade. Enjoy and do let me know if you try it.
My bird eye chillies arrive yesterday. They are now soaking in some water and tomorrow I’m making it. I miss Nandos and this will remind me of South Africa. I’m excited to taste the final result. Thanks for sharing and Wish me luck, I’m planning on making a huge batch and then can it for later use.
I hope you enjoyed the sauce Dawn and that it was the taste of home you remember. Do let me know how you got on xx
Hey Jo, one quick question. Do I clean out/discard the bell pepper and red chilli seeds or retain them in the puree mixture. Thanks Neha
Hi Neha, I discard the bell pepper seeds but keep the red chilli ones if I want it first hot, discard them if I’m after a milder batch. Bell peppers aren’t hot at all but the chillies should be pretty hot so it depends on how hot you like it x
great recipe! I usually pour out half a bottle of nandos extrahot sauce on my meal . now I make my own thanks to you. I used 20 orange Habeneros and 10 bell peppers instead. I also poured the vinegar through a filter bag of Oak shavings. so it captured that flavour. all i can say is WOW! I cannot taste the difference to the nandos original. when storing in the fridge for regular use, i find a small build up of a blackish bacteria near the top . i did use a sterile container. any idea what i can use as an added preservative?
Hi Craig. Your feedback has absolutely made my day! I am *so* thrilled that you like this recipe so much and find it so similar to Nandos 😀
How long are you storing it for? It freezes brilliantly so I would do that if you want to keep it for longer than 48 hours in the fridge.
Amazing, I’m also a KCL dental graduate and came across your blog by pure coincidence! This is amazing!
Dr. Sum
I found this recipe and made my first batch earlier this year because our supermarket stopped selling Nando’s. Now it’s a favourite and I don’t and won’t, buy shop bought again. I made one change to the recipe by reducing the amount of lemon zest and juice and only use 1 lemon. I live in Cyprus and the lemons are big here! We use the peri-peri on salads to spice them up and serve with bbq’d meats.
Friends love this sauce, so this year I am making some for Christmas gifts and will be pouring the peri-peri sauce into some decorated bottles with the customised air tight stoppers. I have frozen it, but now I store my sauce like this in the fridge, and it keeps for ages, although we have usually used the whole lot within a couple of weeks. Well done Jo.
Mutley 99
Thank you ever so much for the kind words Jane! Delighted you like it x
I make a double batch of this about once every 4-6 weeks as my 15 yo child will eat and eat and eat the peri peri chicken like there’s no tomorrow! I get my chilis on Amazon and generally follow your recipe to a T; it’s perfect and comes out brilliantly every time. Thank you!
I couldn’t find dried peri peri chillis so I used fresh birds eye chillies.
The sauce tasted very nice but I was expecting it to be more like the marinade that nandos uses but it was more similar to their table sauces which do taste different to the actual marinade they use for cooking.
I will make it again, but it doesn’t quite replace the real thing.
To be perfectly honest this isn’t very close to Nandos, which is the reason I tried this recipe.
The flavour profile is quite far off. Perhaps you should specify specific brands of ingredients if you believe your recipe does mimic nando’s peri-peri. Because with good quality sourced ingredients it’s really not close at all.
This sauce keeps for a LOT longer than 48 hours. It will keep in the fridge for a couple years, probably a couple month unrefrigerated. Lots of vinegar and lemon in there to lower the PH.
Hi! I’ve tried this recipe after I went to London and got my first taste of Nando’s. I live in France so we don’t have Nando’s here, so when I found your recipe, I was so excited! I’ve tried it once so far and I loved it. I want to make it again for my Christmas meal, but my mom doesn’t eat meat, do you know if I can use it with fish other than salmon? Like cod, maybe, or something else?
Thanks! 😀