

It’s become a lovely tradition that whenever one of Hungry Hubby’s team at work has a birthday coming up, I make them a cake. Or a chicken pie in the case of the “I’m not that fond of sweet stuff” guy on his team 😉
The great thing for me is that they often give me completely free reign to get creative and as I knew the lass this new cake is a fan of all things lemon drizzle, my Lemon Cheesecake Mousse Cake was born. Well, a lemon drizzle is a lovely thing but I wanted something which was much more celebratory and special for a birthday.
I think I succeeded!
At this point, I have to give a shout out to the 200 and odd members of the brand new Every Nook & Cranny Facebook Community! It’s a Facebook group I started so that readers who have questions, want to share photos of their versions of my recipes and generally chitter chatter about food can come together.
I’ve been taking polls on things like which filling I should make for this cake and which recipe they want me to make next, as well as sharing behind the scenes sneaky peeks that only appear in the group! When I posted a sneaky shot of this cake before the birthday girl got to see it, so many people requested the recipe, I’ve pushed back my recipe schedule to bring it to you today.
Come join us – we have plenty of cake 😉

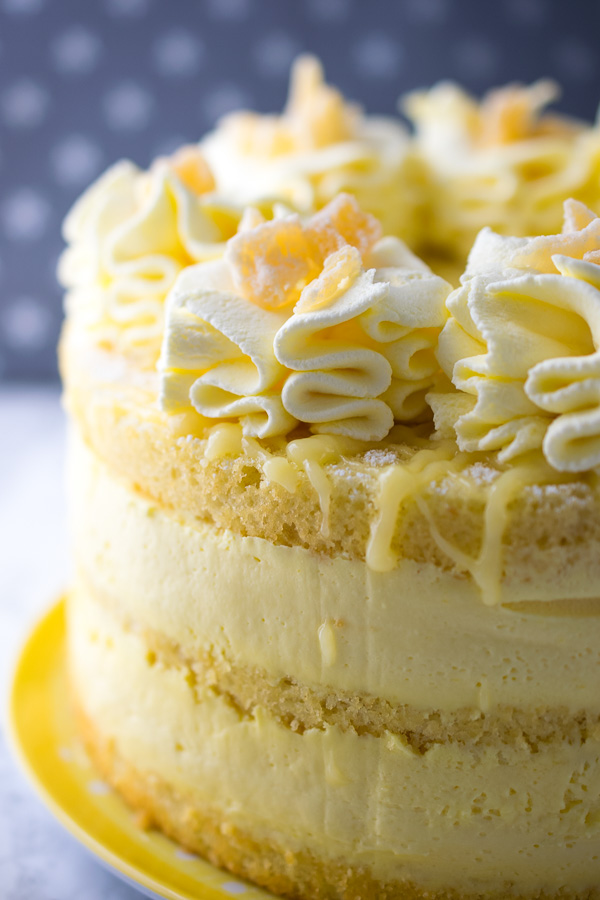
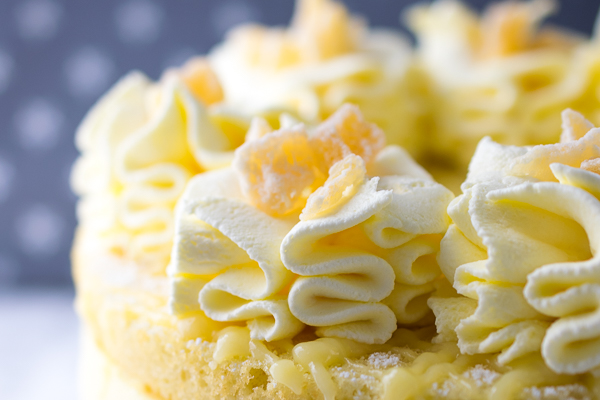
But back to the cake. What you have is three layers of lemon and almond sponge, sandwiched together with the lightest, fluffiest, most lemony cheesecake mousse that you can imagine. It’s finished with a little icing sugar, a drizzling of lemon curd and rosettes of lemon fool – that’s whipped cream with yet more lemon curd rippled in before piping tall, frilly rosettes on top.
Do try my Microwave Lemon Curd recipe (it’s super fast to make!) and if you want to get the same frilly effect on the piping, you’ll need a Mrs Whippy Nifty Nozzle from Sugar & Crumbs.
And you know what? This cake looks super impressive and complicated to make but the sponges are so fast to bake and thin enough to be fully cool by the time the mousse has been whipped, that I genuinely think this is easier and faster than a Victoria Sponge!
I’m delighted to say that both the birthday girl, Sarah and the rest of the office loved this Lemon Cheesecake Mousse Cake. Even with Hungry Hubby’s dodgy slicing skills, it served 16 people easily – this is definitely a cake for a crowd and perfect for a celebration.
Ooo – imagine making this for your wedding cake?! I feel a renewal of our vows coming on 😉 … But in case you needed any more convincing that this cake is delicious and worthy of your patience whilst it chills overnight in the fridge, then take a look at this email from one of HH’s colleagues approximately 3 minutes after serving the cake:

Layers of lemon almond sponge with light as a feather lemon cheesecake mousse filling. All topped off with lemon fool (whipped cream with lemon curd folded in). A lemon lover's dream dessert for Springtime!
- 4 large eggs
- 120 g caster sugar
- 120 g plain flour
- 60 g ground almonds
- 2 tbsp lemon juice
- 60 ml lemon juice
- 12 g powdered gelatine (they are sold in sachets which weigh about 12g)
- 375 ml double cream
- 100 g icing sugar
- 360 g cream cheese (use full fat)
- 280 g lemon curd
- 1/4 tsp yellow food colouring gel - optional
- 4 tbsp lemon curd
- 200 ml double cream
- 1 tbsp candied lemon peel or crystallised pineapple
- 1 tbsp icing sugar
-
Start by lining three 8inch round cake tins (sandwich or deep - use whichever you have) with silicone liners or baking parchment and preheating the oven to 170˚C.
-
Whisk the eggs and caster sugar together on high speed until tripled if not quadrupled in volume. Dribble in the lemon juice with the whisk still running.
-
Sift over the flour and almonds and fold in. Divide between the three cake tins and bake for approximately 12 minutes. They will be quite pale but dry to the touch and bouncy when pressed in their centres when done.
-
Cool still in the tins on a rack for 5 minutes then remove from the tins to finish cooling which shouldn't take much more than another 15 minutes.
-
In a small bowl, add the lemon juice and still in the gelatine. Allow to stand until "bloomed" - i.e. it because a firm gel. Either heat on in a small saucepan until melted or give 15 second zaps in the microwave (on medium heat). Allow to cool whilst you prep the rest.
-
Still the double cream and icing sugar together then add in the cream cheese and lemon curd (add the food colouring now if using). Whisk on high (I use my stand mixer but an electric hand whisk would do) until it starts approaching firm peaks - it won't get stiff and over-whipped like when you whip cream by itself can.
-
Pour in the melted but cooled gelatine and stir well - it will look runny at this point and you will be worried if it will set. Don't be! Simply whisk again until those almost stiff peaks form. Gelatine whisks up really well so it plus the cream should leave you with a super light and fluffy mousse.
-
If you have a springform 8 inch cake tin, line it with silicone liners or fresh parchment and place one of the cooked sponges in the bottom. If not, make a 3-4 inch deep collar of parchment and secure it around the first layer of cake (I use a piece of sellotape on the outside of the parchment). This is a job to do with a helper if you can!
-
Scoop the mousse into a large piping bag if you have one and pipe half of it on top of the sponge - if not, spoon it in and smooth with a spatula.
-
Add the second sponge layer, the second half of the mousse and top with the final sponge. Press lightly to level and ensure there are no air pockets then chill overnight in the fridge.
-
Remove the cake from the fridge and if using a cake tin to set it in, unclip and remove it to a serving plate. Carefully peel away the silicone liner or parchment and if needed, tidy up the edges with a hot palette knife. You shouldn't need to do much tidying up!
-
Sift over the icing sugar to give a reasonably thick layer. Add 1-2 tbsp of the lemon to a small piping bag or a plastic food bag and snip off a small corner - pipe lines of curd over the top of the cake. Tip - be brave and go fast or the heat of your hand will start to melt it and make it harder to pipe.
-
Whisk the double cream to just soft peaks then fold in remaining lemon curd until just rippled. Put a star tip into a piping bag and add the fool - pipe tall rosettes close together around the edge of the cake and finish with candied lemon, pineapple or even just some curls of lemon zest to decorate.
-
Keep chilled until serving and use within 48 hours.
I love this get-a-grip disposable piping bags - they are nice and big, and make layering up the mousse and sponges easy peasy:
[easyazon_infoblock align="left" identifier="B009OHS9RG" locale="UK" tag="evnocr-21"]
This post contains affiliate links, meaning I will earn a little commission if you chose to buy items I’ve advertised, helping me to bring you all these recipes for free!
Like this post? Then why not try these related recipes:
-

- Lemon & White Chocolate Fruit Tarts
-
- Peach Melba Mousse Cake
-

- Lemon Drizzle Scones
Jo, This cake is absolutely fabulous! Lemon sponge layers with lemon cheesecake mousse gorgeousness – DIVINE! x
Thank you Jo for your lovely comment! This cake went down extremely well indeed 😀 x
Love the look of your Lemon Cheesecake Mousse cake. My husband’s Birthday is on Friday and he has requested a lemon cake and as his favourite dessert is cheesecake this hits every box. Not that I’m complaining as I love lemon cake! My girls and I will love making this together tomorrow night. Not promising to share any photo’s though as my piping skills are lacking.
Oh I love that you and your girls are going to make this for your hubby Lesley, I hope you enjoy it. I think it will be a great cake to make with the kids. Happy birthday to your hubster and do share photos – when a cake is made with love, it’s always a beautiful thing x
This cake looks and sounds AMAZING! I’m going to have to make it. I know it will disappear fast!
Thank you Thao! I hope you do try it and enjoy it xxx
Hello, I would like to try this for under a mirror glaze. Do you know if this will freeze well?
Hi Demi. I haven’t personally frozen this cake but in theory, it should freeze well. I do love mirroir glazes, do share a photo of yours on Facebook, Instagram or Twitter and tag me in it when you’re done!
Hi there. Double cream is scarce where I am. Can I use heavy whipping cream instead and maybe add a bit more gelatin to compensate?
Hi Jen. You can absolutely sub double cream for heavy whipping cream, it’s close enough in fat percentages that you won’t need to add gelatine x
Could you please give the recipe again but using Amercian English measurements. I just never learned the metric system. Thank you so much. The cake looks awesome but I am put off by the metric measurements