
I have a friend (Liz) who is adamant that the method for making Greek yogurt with your Instant Pot that I wrote about a while ago is far too complicated.
So much so, she hasn’t even attempted it. Now, I normally concede if someone tells me a method I’ve written is unclear but as it became second nature to me really quickly and further streamlining seemed impossible, I didn’t try very hard to reinvent it (sorry Liz!).
Following that, a few readers asked me what I knew about using UHT milk to make yogurt. Apparently, it cut out a fair few steps compared to ordinary milk so went all wannabe-food-scientist and started researching how to do it.
I’m now sharing my results for how to make brilliant (and easy) Instant Pot UHT Milk Yogurt.

What is UHT Milk?
I started by finding out what exactly UHT milk is, as I realised, I didn’t actually know and I had been shunning this long-life milk product without finding out anything about it. UHT stands for “Ultra High Temperature” and the difference between it and pasteurised milk is that it is heated to the point it is actually sterile. That means there are no live microorganisms in it after its processing is complete.
Pasteurised milk (more commonly referred to as “fresh” milk in the UK) has been heated to a lower temperature meaning that bacteria which cause the milk to go off (“spoilage”) remain and therefore, it must be chilled and used within about a week. UHT milk can remain unopened in your cupboard for almost a year.

Making Yogurt at Home
Now, we need to take a brief look at the process of making your own yogurt. The whole point of heating and cooling fresh milk before adding in a small amount of live cultured yogurt (referred to as “inoculation”) is to kill the microorganisms in this fresh milk before incubating it in your Instant Pot at a constant temperature until it is set.
Logic, therefore, tells us that you can cut this whole palaver out if you substitute fresh for UHT (i.e. sterile, meaning no live microbes within) milk and go straight to inoculation and incubation. Let’s see what my results were after I got all mad scientist and concocted an experiment in homemade UHT yogurt making!
[clickToTweet tweet=”Find out how to use UHT milk to make your own yogurt in the Instant Pot! All secrets revealed :D” quote=”How to use UHT milk to make your own yogurt in the Instant Pot! All secrets revealed :D”]
My rationale was – if UHT milk produces good tasting, well-set yogurt reliably, then why should we not use it? It is vastly cheaper than fresh milk is at around 49p per litre (from Aldi) and I’d also heard that adding milk powder could thicken the yogurt to the degree that you don’t need to strain it, meaning even more time saved.
The Experiments
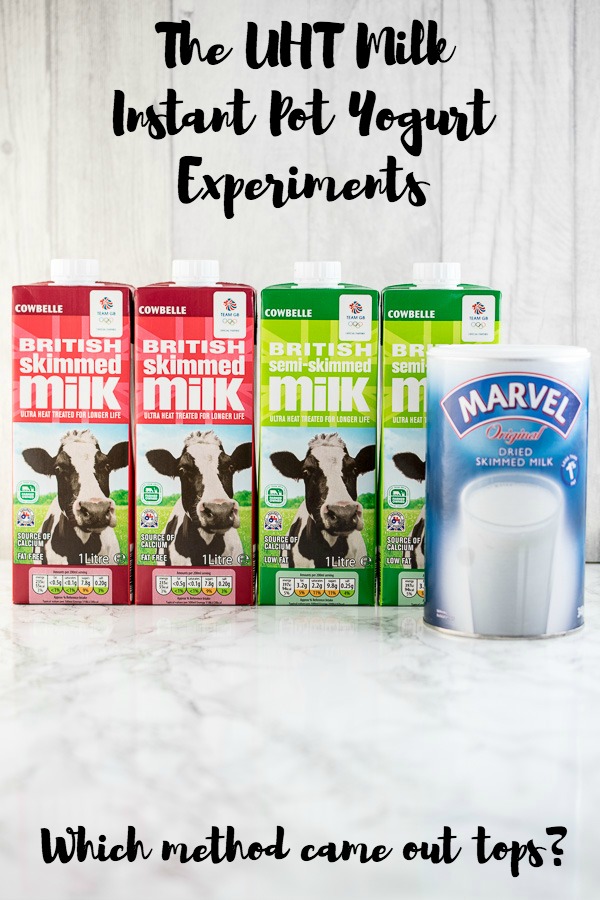
My experiment was simple – I was going to use the same method each time, as well as the same yogurt “starter” (which was from a batch of my Instant Pot Greek Yogurt for consistency) but vary which sort of UHT milk (skimmed or semi-skimmed) and whether or not I added dried milk powder. My basic experimental recipe was:
1 litre of UHT milk (skim or semi)
2 tbsp yogurt starter (from a previous batch of my pasteurised IP Greek Yog)
Optional addition – 2 tbsp dried skimmed milk powder
Method – whisk ingredients together then use “Yogurt” mode on the IP set to 10 hours
Let’s see how I got on:

Experiment One – Skimmed UHT Milk
For the first batch, I used skimmed milk alone…

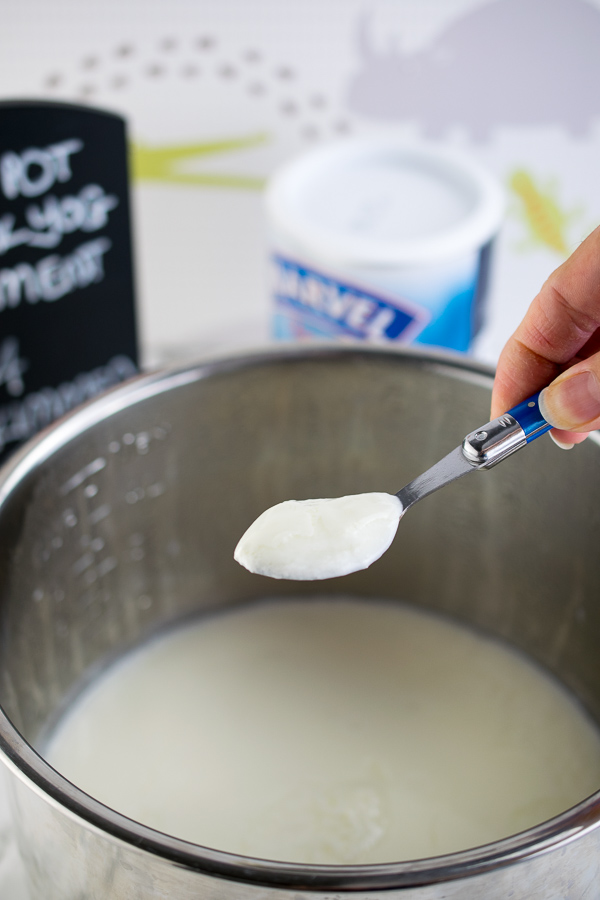
… and after 10 hours of incubation, it had not set! It had started to thicken but wasn’t anywhere near truly set so I whisked it well and gave it another 10 hours. And it set very well indeed. You can see from the photo above how creamy it was and how the whey had split from the yogurt so it only needed to be strained very briefly.

Taste wise, it otherwise yielded a tart but thick and creamy yogurt with twice the volume of whey to yogurt after straining for about 10 minutes. The tartness comes from the very long incubation period as it hadn’t set in the time.
Note that some homemade yogurt recipes go up to 20-22 hours so it’s not “wrong” to leave it that long but from a food safety point of view, I’d not want dairy products sitting out much longer than 20-22 hours so if yours doesn’t set in that time, then I’d discard it and start again.
Experiment Two – Skimmed UHT Milk plus Dried Milk Powder

Next experiment, I added some dried skimmed milk powder to a little of the milk and the yogurt starter, then gave it the 10 hours incubation. It set perfectly and was much thicker than the plain version from Experiment One. P.s. I got this milk powder in Waitrose but larger supermarkets usually have it (we aren’t near many large stores, just a few “local” ones which don’t carry much variety of anything really).

If you want a low-calorie yogurt that requires little or no straining to get to your desired thickness, then UHT skimmed milk plus dried milk powder may be the way to go for you. For me personally, I like it much thicker and a little creamier in taste. Whether UHT or pasteurised, I find skimmed milk yogurt is always a little tarter/sharper in its taste which is no surprise, given how little fat there is to round out the flavour.

Experiment Three – Semi-skimmed UHT Milk
Experiment 3 was plain semi-skimmed UHT milk. When I make yogurt by a more traditional method, I most often use semi-skimmed pasteurised milk so I was keen to see how this one tasted and also what texture it came out using UHT.

Result? Well, it was set, but softly so and required straining to get it good and thick in texture. Plus, I realised that you really do need to make sure that the milk powder is fully dissolved before you add it to the milk or it will give you grainy yogurt that no amount of whisking and straining will completely sort out. It was, however, otherwise comparable in taste and texture (after straining) to my ordinary yogurt recipe.
Experiment Four – Semi-skimmed UHT Milk plus Dried Milk Powder

The final experiment added in some dried milk powder to UHT semi-skimmed milk. Could this be The One? A yogurt to end the search for homemade yogurt perfection?…
… actually, it really isn’t far off! This time, I would be hard pushed to tell it apart from my pasteurised milk version. The interesting finding I do have though, having done this quite a few times now, is that I find yogurt which has added milk powder needs a longer straining period.
I must look into the science behind it, but there appears to be something which makes the yogurt so stable and thick, that it can take 8-10 hours of straining (in the fridge) to end up with Greek-style yogurt. With pasteurised milk, this takes me hardly more than 15-20 minutes meaning I can do the straining on the countertop before chilling the finished yogurt. Interesting stuff indeed and it seems to fit with the experiences of my friends who have tried similar UHT/milk powder yogurt recipes before.
The Results
To me, the winner is the batch from Experiment Four. It gives a very creamy result and you don’t need to strain out much whey to get it really thick, just like my favourite Greek yogurt. Plus, you get a richer flavour without having to use full fat/whole milk and it’s extra fat and calories! Speaking of calories:

Do remember if you are straining out the whey, you are losing a few calories with it but the remaining yogurt becomes more concentrated and therefore it has relatively more calories, spoon for spoon. But I really am getting pedantic there so let’s leave it at that!
Also, think about what you want the yogurt for. Things like smoothies or milkshakes may be better with runny yogurt but to make salad dressings or tzatziki, the thicker the better.
But of course, there is the matter of taste. You may prefer really tangy yogurt in which case you can incubate it longer (say up to 12 hours) or leave it a week before eating, in a sterile jar in the fridge as it will get sourer tasting the older it is. If you like it more creamy, incubate for 8 hours and use quickly.
Troubleshooting
- If using dried milk powder, you must make sure it is dissolved before adding to the liquid milk or the yogurt will be grainy. I whisk it with a little of the UHT then zap on low for 30 seconds in the microwave and allow to cool to room temperature before using so not to kill the live culture in your yogurt.
- If it doesn’t set the first time, give it a very very good whisk and try once again with a further incubation of up to 10 hours immediately. If it doesn’t set, the yogurt culture is likely to be dead – discard your attempt and chalk it up to experience.
- I use a little of the yogurt from the batch before as my starter but have had good results with Yeo Valley Natural Yogurt, available in small little single serve pots. Other good ones are Fage 0%, 2% or Total Greek Yogurts. Rachel’s Natural Yogurt is also good. Basically look for a plain yogurt with “live cultures”.
- Make sure your Instant Pot is spotless before starting and consider steaming it before starting to sterilise the inner pot and inside of the lid. Simply clean it, add 250 ml water to the inner pot and pop the lid on with the valve closed and give it 5 mins on Manual High with a QPR before carrying on with the recipe below.
Congratulations on reaching the end of this mammoth post and for all my friends and readers who felt like Liz, that it is just too much faff to make yogurt using your Instant Pot… I hope I’ve convinced you it is very easy, adaptable to your preferences and yields just as good a result as more long-winded pasteurised milk versions do.
If you want a super simple and hands free homemade yogurt recipe, using your Instant Pot, then this is the one for you!
- 1 litre (4 cups) UHT milk (skimmed or semi-skimmed as liked)
- 2 level tbsp yogurt starter
- 2 level tbsp dried milk powder (optional)
-
Whisk the yogurt starter with a little milk and then add to the Inner Pot and whisk very, very well to combine. This is very important to ensure a good and even set.
-
{Optional step:
If using dried milk powder, put it in a small heatproof bowl and whisk in 2tbsp of the UHT milk you are using. Zap in the microwave on low for 30 seconds to ensure it has dissolved and allow to cool before using. When at room temp, whisk in the yogurt and add the lot to the inner pot with the rest of the litre of your UHT milk.
-
Place the lid on (it doesn't matter if the valve is open or closed in yogurt making) and set the IP to "Yogurt" for 10 hours. (You can reduce it to 8 hours for a milder taste or 12 hours for extra tang.)
-
When finished, transfer to sterilised jars and chill or strain through a sieve lined with a few layers of kitchen roll or cheesecloth to remove as much whey as you like. Use within two weeks and keep refrigerated for that time.
- You can use skimmed, semi- or full-fat UHT milk to make yogurt with. Skimmed is more tart whereas full-fat is very rich, smooth and creamy.
- Dried milk powder thickens up the yogurt considerably - only if you like super thick, Greek-style yogurt do you need to strain it.
- If straining whey for a long period of time or it is very hot weather, do it in the fridge.
- Sterilise your glass jars and their lids by running through the dishwasher on hot after making sure there is no food inside them. Do not touch the insides so not to contaminate them with microbes from your hands which could lead to spoilage.
This post contains affiliate links, meaning I will earn a little commission if you chose to buy items I’ve advertised, helping me to bring you all these recipes for free!
Like this post? Then why not try these related recipes:
-

- Homemade Creme Fraîche
-

- Vanilla Yogurt Cake
-

- Instant Pot Greek Yogurt

Thank you for sharing 🙂 This is exactly what I had had been waiting for.
I recently started making yogurt in the IP. I like my yogurt *really* thick and I strain for several hours or overnight.
I first used fresh, full-fat milk (€ ouch!) and the results were fantastic. Then one day I couldn’t find fresh f-f milk in the shop and did the *whole process* with UHT f-f milk and got excellent results too. When my local shop ran a special offer on semi-skimmed UHT which was too good to ignore, I found myself with 16 litres to experiment with!
So far, all the semi-skimmed batches have been real disasters: hardly thickened after 12-14 hours; too liquid to strain and the resulting the whey is like single cream; I tried mixing full-fat and semi-skimmed, but it hardly made a difference; I tried adding dried milk powder, but the result was grainy (I should have thought of heating some of the milk before mixing)…
Thanks to your efforts I now have the definite recipe, and I will try it as soon as the current batch is eaten!
Well I hope my experiments do help you. I think that as this is not a standardised process and we’re dealing with unknown cultures as home yogurt makers (rather than professional ones), there are always going to be the occasional unexpected bad batch. I do think whisking very, very thoroughly is crucial with UHT milk as there is no heat to help the inoculation process along, as there is in pasteurised milk yogurt. Do let me know how you get on 🙂
I have followed the suggested recipe and here is my update…
I used 1 litre (± 4 cups) of semi-skimmed UHT milk, heated some of it to around 40°C (104°F) before thoroughly mixing 2 tbsp of dried milk powder (I used a stick blender!), then added 2 tbsp of a recently-made batch of yogurt, before mixing everything back together in a lidded container ready for the IP.
I left the yogurt mixture to ferment in the IP for 14 hours, then set it outside to cool (it is cold enough at the moment!) then left it in the refrigerator before straining. On removing the lid, I saw that a light and barely-grainy layer had settled on the surface as well as at the bottom of the container.
I have said in my previous comment that I like a *really* thick yogurt and I wanted to know how much whey would drain in order to get there; after about 6 hours, I measured 500ml (± 2 cups) of whey and the same of thick, creamy yogurt.
The whey is clear and pale, a definite improvement from the cream-like whey of my previous attempts. I believe that cooling before straining helped.
Once whisked with a fork, the yogurt is thick, shiny and creamy. The taste is rich and not sharp at all. In all its aspects, it reminds me of mascarpone!
All in all, this recipe has been a huge improvement on my previous attempts with UHT milk. I had been tinkering around before, and this has given me a clear outline.
I would still like to reduce the amount of whey to the same ratio I get with fresh full-fat milk, which is around ⅓ or less. Increasing the amount of dried milk powder might help.
As an aside, I had bought a new pack of dried milk powder and there is a recipe for ‘home-made yogurt’ printed on the back. It lists 6 to 8 tbsp per 1.4 litre (± 6 cups) of milk and 120 ml (± ¼ cup) of yogurt (starter). I will try that next…
Thank you for sharing 🙂
That’s brilliant – I’m so pleased you’ve had improvement on your original attempt. And actually, I’ve been playing since writing up this post and I think adding 4 tbsp milk powder per litre may be *my* perfect thickness but I’ve seen people add 100g per litre. I think the important part is definitely getting the powder dissolved before adding it to the milk, as you did. Happy yogurt making and thank you for sharing your progress update x
Thanks for the interesting article.
UHT actually stands for Ultra Heat Treated so you might want to change that on your website.
https://www.collinsdictionary.com/dictionary/english/uht
Hi Yvonne – thank you, I’m really glad you enjoyed reading my post. UHT can mean either Ultra High Temperature or Ultra Heat Treatment though, it’s referred to as either in both academic and more informal texts interchangeably.
Hello again 🙂
A quick update on the latest batch I made in the last couple of days…
I used 1 litre of full-fat HUT and heated ¼ of it to ± 45°C before mixing 50g of dried milk powder and 2 tbsp of the previous batch of yogurt. After incubating (12 hours), cooling and straining (overnight), I measured 300 ml of whey , just under ⅓ of the total liquid I started with.
To be honest, the difference was apparent as soon as the yogurt was fully incubated. It was very firm and I did not need to spoon it out to strain it as it just ‘plopped’ out in a single mass without leaving anything behind.
The strained yogurt is very, firm, rich and creamy. No tartness, but I did not find any tartness in the semi-skimmed batch either.
Based on on this, I think I will add 100g of dried milk powder when using up the semi-skimmed UHT milk I still have left, to ensure a firmer, richer batch. Hopefully, this will also help reduce the amount of whey to 300ml as when using full-fat milk.
It is very interesting to see the difference a relatively small change here and there can make to the result… Thank you for pointing me in the right direction. Much appreciated 🙂
You’re so very welcome. And thank you for keeping the feedback coming – it will only help readers to work out how best they like their own yogurt!
I’ve been using UHT milk for yogurt for at least a decade now (in the USA we can also buy UHT milk in the refrigerator section as “ultra pasteurized”). I don’t use my Instant Pot since I have an Excalibur dehydrator and can make yogurt directly in glass quart jars using the dehydrator as the incubator. However, I wanted to comment since I recently used some leftover half and half to make yogurt, and was surprised to make the thickest, creamiest yogurt ever! There is zero need for straining. Of course, the calorie count is higher, but I just reduce the serving size since it is so satisfying. I think in Britain half and half is called half cream; single cream would be too rich, unless you cut it with milk. You’re looking for about 12% milk fat.
Hi, I’ve been making UHT milk yoghurt for a while now. I have an aldi esky-style yoghurt maker.
I use
1/3 cup full cream powdered milk
1l full cream UHT milk
about a tablespoon of the previous batch of yoghurt.
My initial starter was a packet mix yoghurt.
The third of a cup of powdered milk makes for a very thick yoghurt that is practically solid in the pot, so I don’t strain it further.
I have recently purchased a kefirko cheese maker that I do use to strain the yoghurt and press it (with a fairly light spring that comes with the cheese maker) to make yoghurt cheese. My wasabi yoghurt cheese was a smash hit, and gone in a week.
[…] than 2 seconds. You can use this with the cold start method, but it may take longer to set. (click here) —Ultra-pasteurized and ultra-filtered: Filtered to have 50% more protein, 30% more calcium, […]
Thanks all for the terrific information, I recently bought a replacement Morphy Richards bread maker as it has a yogurt setting. One of the cheapest on the market .Have been experimenting with quantities of milk powder to get a thicker result , three heaped tablespoons per 500ml of fuel cream milk works well, very pleased to hear that I can cut some calories with semi skimmed too, so fresh bread during the day , fresh yogurt over night , brilliant