

Homemade Cinnabons, in equal measure heavenly and evil, all at once. And not just because they are a boatload of sweet, soft, gooey, spicy, sticky calories but because my own recipe for them appears to be conspiring against me. Let me elaborate. I do believe, cinnamon buns are my most favourite bake in the world to make and devour, greedily, still warm from the pan.
It began with the development of an insatiable taste for McDonald’s cinnamon donuts as a small child (don’t judge me, we all have a past) and it took off exponentially to an obsession when my family visited Florida when I was 8 years old and I discovered the unbridled joy which is Cinnabon.
Oh my, it took many batches (oh the horror) but once I perfected my recipe based on the 25-year-old taste memory of those sticky buns with cream cheese frosting, eaten on a paper plate with a plastic fork under intense Floridian sunlight on each day of our 15 day trip, bought by my dear old Daddums, I am transported back to those hot sunny days with a single sniff.
One bite and I’m lost, you’ll have to come back later as I’ll be no use to you until the bun is in my tum.


-

- Homemade Cinnabons
As I love them so and believe they could be the best thing I make, I’ve been trying to get the recipe up on the blog for some time now. However, the evil little buggers have tried to foil my best efforts to share. The first time was last November when I got so far as to photograph the proving dough only for Nicky the Nikon (my DSLR – yes, I name all my inanimate possessions, again – don’t judge me) to be shook off my tripod as the washing machine reverberated and span and the mirror smashed inside the camera, rendering it useless.
My heart stopped a little bit until we remembered I had insurance which covered accidental damage but needless to say, Nicky was in the shop for a fortnight and I was unable to complete the blog post. I love taking process shots, it’s one of my unwritten rules for my blog that I try to post shots as I go for every recipe I publish.
The second time was only last night – I managed to get to the point of taking my photos, even though I had been a tad lazy and sundown appeared, tinting them all blue with late British afternoon light but nonetheless, the shoot was done.
I left them cooling in the pan and headed for my laptop to post-process the shots and get the blog post written up, however, my laptop had a black screen and it took nearly 90 minutes on the phone with Apple care to get it rebooted and working again! I’m beginning to worry about making them again as I fear some unspeakable technological failure will befall me if I do!

For all their apparent plotting to take down my blogging kit, these buns are a delight to eat. Hungry Hubby’s office has been begging for more since the last lot he took in for them and one colleague, in particular, referred to them as the Holy Grail of sweet treats from my kitchen (they receive a lot of baked goods as I am always inventing and using them as test subjects).
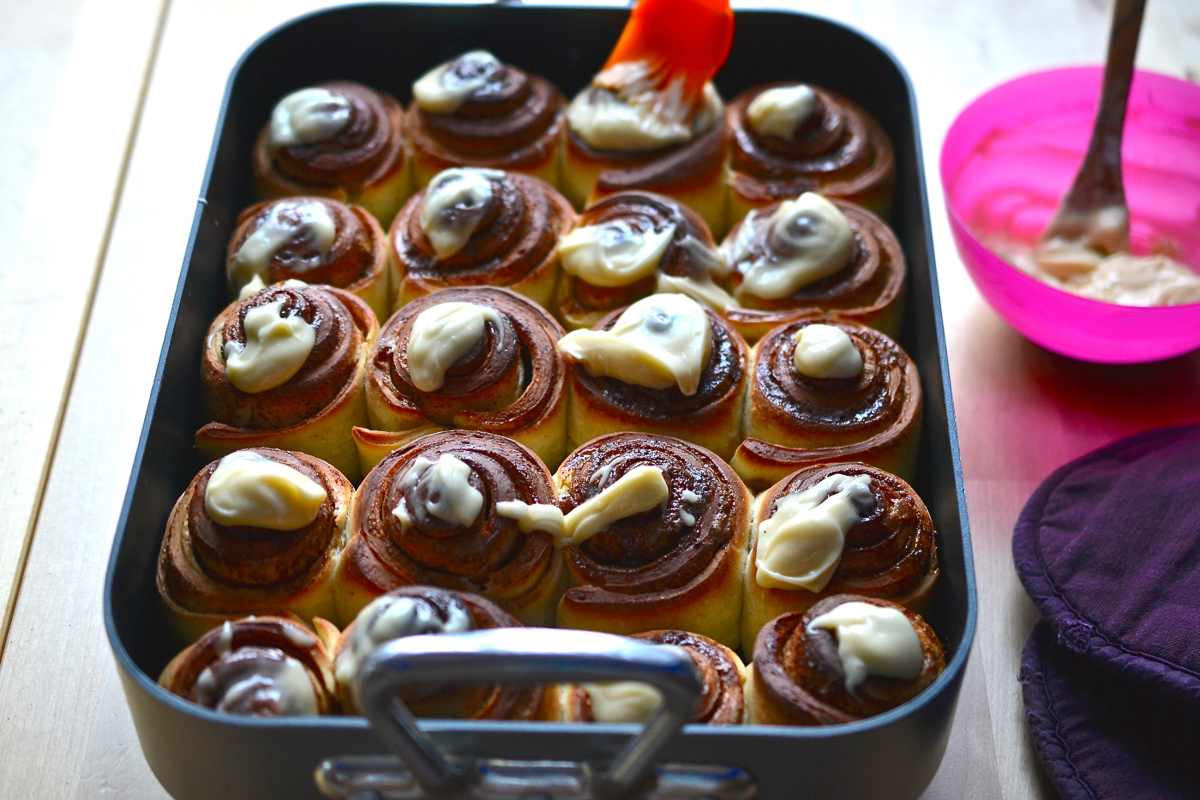
These seem to be top of the pops at the moment. If you’ve never used yeast before, this would be a great way to get stuck in. It’s easy peasy to knock up a soft, sweet, yeasted dough and the more rustic they look, the better. I love the humps they get and the swathes of thick, luscious cream cheese frosting which demand you eat them with a pile of kitchen roll close at hand.
Make sure your dough is soft, almost sticky when you set it to prove for the first time so the final buns will be soft as marshmallows in the middle – buttermilk helps to tenderise them and give a little tang. Don’t be shy with the cinnamon either – you need more than you think to give plenty of flavour to the vanilla seed studded dough.
My preference is for soft brown muscovado sugar as I love the rich caramel tones it gives but you can use ordinary soft brown if that’s all you have. As for the quantity – this recipe makes 20 fat, gooey buns of loveliness and at first, it may seem crass, vulgar even to make so many but I promise you, half the recipe at your peril. They don’t last long and despite their naughty side, these buns are made to share.
Sweet and sticky homemade cinnamon rolls frosted with cream cheese icing. Just like Cinnabon make!
- 750 g bread flour
- 12 g dried active yeast
- 50 g caster sugar
- 1/2 tsp salt
- Seeds from one vanilla bean
- 2 large eggs
- 50 ml oil veg or rapeseed is good
- 325 350 ml buttermilk* *= or use 2 tbsp of Greek yogurt made up to 350ml with milk
- 85 g butter
- 3 tbsp ground cinnamon
- 2 tbsp cornflour
- 75 g full fat cream cheese
- 45 g soft butter
- 2 tsp vanilla
- 2 tsp lemon juice
- 1/2 cup icing sugar, packed when measured
-
Make the dough by mixing together in a large bowl all the ingredients, reserving a little of the buttermilk at first only adding it if the dough seems a little dry. Knead for 1015 minutes until soft and a little sticky even then place in a greased bowl covered with cling to prove until doubled if not trebled in volume.
-
Working with half the dough at a time, roll it out to a large rectangle no more than 5mm thick.
-
Soften the butter by blitzing in the microwave for 2030 seconds only and beating until very soft – it’s easiest to work with if it isn’t fully melted. Spread half over the dough.
-
Mix the cinnamon, cornflour and muscovado sugar together in a bowl and sprinkle half over the butter.
-
Roll up reasonably tightly and slice into 10 rolls, repeat with the other half of the dough. Place cut surface up in a large roasting tray – you can actually use whatever dishes you like, even disposable foil trays if you plan on giving them away.
-
Cover with cling and allow to prove until just about doubled in size again – they should be just about touching. Preheat the oven to 200˚C and when ready, bake for 20-25 minutes. They will rise up, brown on top and peak a little in the middle. Carefully prodding the size will see the bins spring back when they are ready but beware the hot sugar on your fingers.
-
Whilst the rolls are baking, make the frosting as you want to paint it on as soon as they come out of the oven to keep them soft and sticky, ooey and gooey. Melt the butter in the microwave until liquid then mix in the remaining ingredients and beat until it is smooth. Paint half on (about a teaspoon per bun if making 20) as the buns come out of the oven then when cooled to room temp, paint the rest on. Get the napkins ready and dig in!
This post contains affiliate links, meaning I will earn a little commission if you chose to buy items I’ve advertised, helping me to bring you all these recipes for free!
Like this post? Then why not try these related recipes:
-

- Morning Buns
-
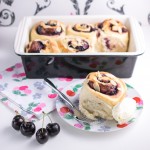
- Cherry Almond Buns
-

- Sticky Maple Pecan BUns
Wow! Those look exceptional. If only I had one to go with my afternoon coffee(s)…
I reckon they cane be made in 2hours start to eating 😉
Yum yum yum! I’m afraid to make these because I might eat them all… But they look amazing!
That is the risk you run 😉
Pure awesomeness Jo. x
Thank you so much for trying them Jen! I’m really pleased the lil miss loved them too 😀
Hey Jo,
For the vanilla in the frosting – is this powder?
Thanks!
I used the seeds from a vanilla bean but you could use a tsp of vanilla powder instead 🙂
This recipe is so delicious and easy to follow it’s dangerous! I’ve made them 3 times so far and had to share the results out to save myself from scoffing the lot.
Hi Sam! Lovely to see you over here – thanks for stopping by. Really pleased you love them so much too, these are perhaps my most favourite recipe 🙂
Can I ask -out of a very keen interest!- what purpose the cornflour serves in the filling? Wondering whether it serves to thicken it once molten so it stays within the swirl? Perhaps? Or not?!
You’re exactly right Claire, it’s to thicken and bind the filling so it stays in your bun, not the cake tin 😉 More nommy noms to eat that way lol!
I can only approve of that! ?
😉
Amazeballs when i tried it. Iv tried and tested many many rwceipes and this is one that i will always use going forward from now onthabk you so much!
Hi Jo, I can’t see the recipe for the cinnabons. All I can see are the maple pecan buns. Could you please help? Thanks.
I’m sorry about that Jackie but thank you for taking the time to let me know something was up! It’s all fixed now, you should be able to see the full and proper recipe x
I can only see the ingredients list but no method?
It’s there now Kelly, something odd happened on the blog backend but it’s working now! Sorry for the delay x
This recipe is so delicious and easy to follow that I have made these homemade rolls few times. your recipe is really perfect.