

Something isn’t right. It’s not December. The nights aren’t drawing in, in fact they are lengthening by the day. There’s no snow to be seen, just sunshine and April showers. Yet somehow, I’ve broken with tradition and created a new cheesecake recipe. For me, cheesecake and Christmas are synonymous – the most indulgent time of the year requires an indulgent dessert.
However, I had some cream cheese burning a hole in my fridge, a bag full of blueberries hanging out in the bottom drawer of my freezer and a selection of biscuits needing to be used before they staled in my biscuit barrel and real hankering for a slab of fruit topped cheesecake. This was the result of that particular daydream.

Normally I bake my cheesecakes in a water bath as I love the silky smooth and implausibly light texture that it produces. I know it seems an unnecessary step to a lot of fridge set cheesecake aficionados but I implore you to try it just once. You’ll be a convert for life.
However, baking a cheesecake in the oven without the aid of steam gives an entirely desirable but different result too. It’s somehow richer, more dense but thick and smooth. For this particular bake, I used maple syrup in place of all the refined sugar apart from the crushed biscuit base.
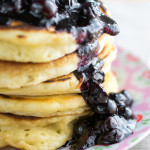
It gives the cheesecake a beautiful manila colour too. I love blueberries and maple syrup on my thick, puffy pancakes but instead of cooking them until thickened and jam-like in texture, I simply cooked for a few minutes until some of the berries popped and released their juices which I thickened with a tiny amount of cornflour.
The maple flavour is present but subtle so if you are in possession of some maple extract, I would add no more than ½ tsp if you would like a stronger flavour but go easy, it’s potent stuff. I prefer drizzling a little extra syrup as you serve each luscious slice.

- 150 g of biscuits of your choice I used half digestives, half Lotus
- 30 g soft butter
- 560 g full fat cream cheese room temp
- 300 g sour cream room temp
- 4 large eggs
- 4 tbsp plain flour
- 150 ml maple syrup
- 200 g blueberries
- 4 tbsp maple syrup
- 1 tsp cornflour mixed with 1 tsp cold water
-
Process the biscuits and the butter until you form a damp sandy mixture. Press into a 9inch round sping form pan which you have lined with greaseproof paper on the base and a light coating of butter on the sides. Chill until needed.
-
Clean out the food processor then process all the filling ingredients until smooth.
-
Preheat oven to 160°C.
-
Pour the filling over the biscuit base and bake for 50-55 minutes until there is just a little wibble wobble in the centre. Turn off the oven and leave in there with the door open a few inches for an hour. Cool on a rack thereafter until it reaches room temperature (this gradual reduction in heat ensures the cake is cooked in the centre and reduces the chances of it cracking by a sudden change in temperature).
-
Make the topping. I use frozen blueberries straight from the freezer as I always have some on hand.
-
Place the berries and syrup in a saucepan and cook for 5 minutes until some of the berries pop and release their purple juices. At which point, pour in the cornflour slurry and whisk it into the juices then stir through the berries. It should thicken almost immediately. Take off the heat and cool for 10-15 minutes before pouring onto the cooled cheesecake.
-
Keep the cheesecake in it’s tin and cover the surface with cling film then chill overnight before unmoulding and serving. Cheesecake freezes well double wrapped in clingfilm in it’s tin whole or in slices which I prefer wrapping in thick tin foil as it is a little more sturdy. Freeze for upto 3 months and thaw in the fridge over night before serving.
This post contains affiliate links, meaning I will earn a little commission if you chose to buy items I’ve advertised, helping me to bring you all these recipes for free!
Like this post? Then why not try these related recipes:
-

- Zingy Citrus Blueberry Bundt
-
- Thick Puffy Pancakes
-

- Perfect Blueberry Muffins
How I love a gorgeous baked cheesecake. Yours looks so divine with that glorious berry topping. I made a ‘naked’ version for an extended family gathering for Easter lunch. Not being in my kitchen, I baked it in an oven without its usual water bath. Despite all care – it cracked. Qu’elle horreur but….theres a nifty trick I used to make those unsightly cracks disappear as if by magic. Boil a kettle, grab a tea towel and offset spatula. Pour hot water in a shallow bowl, dip into water to heat through and wipe dry before carefully pressing and dragging the spatula over the surface of the cake to cover the cracks. Repeat until the top is perfectly smooth. The cheesecake needs to be cold and set for this to work. I placed the covered baked cheesecake, tin and all, into the fridge overnight and ‘rescued’ it next morning.
Now that is knowledge worth having, thank you for sharing!
I definitely wish I had a slice of this cheesecake right now.. it looks SO delicious and I just love that thick layer of blueberry topping!
Thank you 😀
I love those plates! And this cheesecake sounds amazing. Breakfast pancake cheesecake is a winner in my book!
Hungry Hubby came home with them the day he got a proper job where we now live after being out of work for months after an accident. So sweet – he brought the whole dinner service home for me on the bus!
Wow, that cheesecake looks gorgeous!