
In my previous post I shared with you my recipe for Chocolate Milkshake Cookies using the brand spanking new flavoured chocolate icing sugar from Sugar and Crumbs. I do feel a little bit naughty at sharing that recipe first and holding onto this little gem even for a couple of days but they do say always save the best for last.
Just when you thought I couldn’t flog the Black Forest combo to death anymore, I am sent, completely out of my control (*guilty voice*, “your honour…”), a bag of Black Forest flavoured chocolate icing sugar and a-ha! I am vindicated and can trot out another rendition of Hungry Hubby’s favour flavour combination – chocolate and cherries. What can I say? Sugar and Crumbs made me create these for you…


Madeleines are a delicate shell shaped French pound cake in their most pure form. I’m sure I’ve upset the purists once again with my fiddling but I think I could shut them up with one of these. Imagine eating a miniature cake which is everything you expect from the 1970s dinner party favourite – dark and chocolatey, sweet and sour fruity, rich and boozy.
Hungry Hubby made the excellent point that they would be superb with some vanilla ice cream and I wholeheartedly support that over-the-topness 😉 Actually, if you were déclassé enough to have a can of squirty dairy cream in (like I do, every Christmas) to complete the retro chic, kitsch dessert plate of Hungry Hubby’s dreams then what the hell – load that baby up with a squirt too!

Having a tub of my Bing cherry jam longing to be used up and a miniature bottle of Kirsch loitering around liqueur cabinet (next to the equally camp Malibu coconut rum and Archers peach liqueur) looking for another outing, when I saw which flavours Sugar and Crumbs were surprising me with, I jumped at the chance to take my malingering madeleine pan out of hiding and get my bake on.
The beauty of these sweet little cakes is you need to chill the batter to solidify up the butter before baking which means they puff up rather than spread out upon baking. I wouldn’t leave it longer than 24 hours tightly covered in the fridge before baking the batter but its enough to allow the cocoa and Kirsch to work their magic and become even richer in flavour. You won’t get the characteristic hump the puristic plain madeleines have because you bake the jam directly into the cake so it rises less but no matter, they still taste amazing.
Well done Sugar and Crumbs on another fab product! I am very tempted to turn it into Swiss meringue buttercream and also a chocolate cherry mousse next. If you can, do stop by their shop and try some of their fabulous range but if not, just use the same amount of plain icing sugar, replacing one tablespoon with cocoa powder for these madeleines. If you had some freeze dried cherries in, a scant tablespoon of that thrown in for good measure would get you close to the very essence of the Black Forest.

- 100 g melted and cooled butter
- 2 eggs medium
- 80 g Black Forest Sugar & Crumbs icing sugar
- 80 g plain flour
- 1 rounded tbsp cocoa
- 1/2 tsp baking powder
- 20 g ground almonds
- 1/4 tsp almond extract
- 1 tbsp Kirsch*
- 6 tsp cherry jam
- 1-2 tsp cocoa powder for dusting
- *alternatives would include Chambord Framboise, cherry brandy, the cherry syrup in bottles of sour cherries… Let your imagination and taste buds guide you!
-
Whisk the eggs and icing sugar for several minutes on high speed until thick and very much increased in volume. Think sponge or mousse making – you want plenty of air in there.
-
Sift over the flour, cocoa and baking powder then stir in with the ground almonds.
-
Pour the melted and cooled butter down the side of the bowl with the Kirsch and almond extract then fold in until everything is fully incorporated.
-
Cover and refrigerate for an hour minimum up to a maximum of over night.
-
Butter your madeleine pan and sift over some cocoa then preheat your oven to 200°C.
-
Using either two tablespoons to scoop out quenelles of batter into the prepared pans or use a piping bag with about a 1cm opening cutting off the end. The latter is much faster for the impatient!
-
Dot ½ tsp of jam on top then cover with ½-1 tsp of the remaining batter, trying to completely but gently cover the jam. Being too generous will mean the jam sinks to the bottom and bleeds through to the shell surface – this meagre amount is perfectly suspended in the batter so resist being too generous!
-
Bake for approximately 10 minutes until firm at the edges and well risen. The centre will give a little with all that delicious jam in the middle.
-
Cool briefly on a rack then push out of the pan and finish with a dusting of some extra cocoa powder. Best eaten warm on day of baking.
This post contains affiliate links, meaning I will earn a little commission if you chose to buy items I’ve advertised, helping me to bring you all these recipes for free!
Like this post? Then why not try these related recipes:
-
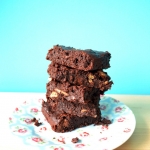
- The Perfect Chocolate Brownie
-
- Chocolate Cherry Friands
-
- Chocolate Teacakes
Mmmmmmmmm!
Those look absolutely lovely, I used to live in Northern Ontario Canada and we love our black forest cake! Since I moved to the States I rarely ever see them in bakeries. Thanks for sharing 🙂
Well I didn’t know it was popular in Canada :). Maybe you can make some to remind you of home x
That sounds and looks mouth watering!